Sunday, December 25, 2016

Dunlop D606

I've been running Shinko Crossfly E-804/805 on the DR650. I have been very happy with the E-805 rear. I'm not particularly happy with the E-804 in the sand...and we always have to deal with sand on our trails. In fact, while not entirely the tire's fault, I took a fall in May on this bike in a sandy rut and the damage to my knee pretty much screwed up my entire 2016 season.


As I start thinking about the 2017 season, I've decided to bite the bullet and go straight to aggressive 10/90s on both my DR and my KLR650. In the 10/90 category the options are pretty much limited to Dunlop D606, Pirelli MT21 and Kenda K760s.

Among those tires, the D606 seems to be the most popular block knobby and I really want to try them. In between rallys, I'll reinstall the Crossflys, as the D606 will wear down to nothing with too much pavement uses.

I have two sets of D606 coming. Best price was Rocky Mountain ATV, which surprised me because normally Revzilla has the lowest prices.


I can't think of too much else I need to do to get the DR650 trail ready.

Update:

Wooohoooo!

A set for the KLR650 and a set for the DR650. I can't wait to take on Devil's Creek on these bad boys.


Saturday, August 20, 2016

DR650 Death Wobble

Well, it looks like I'm going to have to say so-long to my Laminar Lip Speed Screen. My 2016 Suzuki DR650 has developed a severe death wobble and I've concluded that the vast majority of the problem is the Laminar Lip.


The DR650 had a little steering oscillation from the very beginning when I got it in Mid-April. That was mainly due to the motorcycle's off-road geometry and the dual-sport tires. My subsequent addition of some more aggressive block knobby tires didn't help, but I need better performance in off-road conditions like sand and mud.

In late May as I was laid up with a knee injury. During my recovery of almost nine months I made a few modifications to my DR650. I added hand-guards, a Laminar Lip Speed Screen and a few other items. When I finally emerged from my knee problem and was able to ride again, I found the death wobble had developed into the extreme and dangerous tank slap. Mostly in the low 70s, but in some instances, the oscillation commenced in the high 60s. It was intermittent.

Item by item I worked to diagnose the problem that was triggering the oscillation. Take something off, put it back on, take something else off. Well, when the Lip came off, things improved dramatically. I still had oscillation like I had since the beginning, but not nearly the problem I had with it. Without the Lip the oscillation doesn't really start (again very intermittently) until well north of 80 mph.

I really liked that screen when trekking between riding sites, but the alternative is a steering damper and those things run $500 and up. I paid $90 for the screen, but I'm just going to have to pack it away and maybe it'll be useful on some other bike. Plus, I think I'll see if I can tweak a few things and get rid of the rest of that annoying oscillation.

Thursday, August 18, 2016

Lake Alfred Loop

There are a lot more lakes in and around Lake Alfred, Florida than just Lake Alfred. Plus, the roads circumnavigating the area are unnaturally (for Florida) curvy and winding! It's definitely a nice area for a day trip on the motorcycle. I worked up a nice loop for interested riders. From the east side of Tampa Bay it's 140 miles and about 3.5 hours ride time. Sorry, only one dirt road (Brown Shinn Road); and, seriously, it's just a dusting of sand.


CLICK HERE for a pdf link to the detail route through Lake Alfred. Enjoy.


Thursday, July 21, 2016

Key Blanks

I finally got around to purchasing a couple key blanks for my 2016 Suzuki DR650. The motorcycle came with two keys. I keep one stored away. Normally, I carry a third spare key on the bike somewhere in case I lose the key on the road, although, of course I've never done that...wink, wink. I got an extra blank so my son can have a key.

Seller: Online Locksmith (via Amazon)
Blank: SUZ18
Brand: JMA
Price: $2.94 each x 2 = $5.88
Ship: $2.04
Total: $7.92 for two blanks

That's considerably better than the OEM blank which is $16.38 each at BikeBandit.

Wednesday, July 20, 2016

Sand Pit

As mentioned in previous posts, back on May 8 I slid down powering out of a sandy rut and injured my knee. It was the rear I lost, not the front. Anyway, the injury was an MCL (Medial Collateral Ligament) Tear. Well, over the last couple weeks I've been working back up to my regular trail. A couple weeks ago, we rode dirt/gravel roads, last week I was in ONF on their sandy roads...Monday I gave the Sand Pit a try.

There are two "Sand Pits" here in West Central Florida, maybe more. One is a mile long stretch of deep sugar sand on Graveyard Road in the Richloam WMA. The other is the entire Croom WMA! If you want to practice your sand riding in West Central Florida, head to Croom, east of Brooksville. Not to be confused with the nearby Croom Motorcycle Area; I'm talking about the Wildlife Management Area (WMA).


Okay, one confession that I need to make is that I wasn't as gear up as I should have been when I got the injury. It's just so freaking hot here in Florida that sometimes you just role the dice and that's what I did that day on May 8. I wasn't wearing my high boots, knee or elbow guards, neck brace or even a long sleeve shirt. Would any of that helped? Not sure, but being off gave me some time to think about my gear.

The only item that I thought about was better knee protection. My knees are quite exposed when upright and on my side. Specifically something that protected substantially all the way around. My injury (MCL) was to the inside of my knee; that's what Medial means. So I found some EVS knee pads that seem to be the ticket. EVS Glider Lite Knee Pads...$44.10 @ Revzilla.

These type of knee pads are preferable over the knee/shin because I wear high motorcycle boots. They're also preferable because I can fit them under my motorcycle pants. Otherwise, they have an inner sleeve for a tight but comfortable fit and three velcro straps to keep them firmly in place. They're definitely light, but I'm not going to kid you, in 85 degrees sitting on an air cooled dual sport in the woods, you're gonna be sweatin' under there. Glad I got them. I will continue to consider my gear. As I get older I may need alternative stuff.

So back on the Sand Pit, well, it really didn't go that well. I was alone and became a little tentative. The way through sand is with the throttle and speed and being tentative don't go together well. So I decided to cut it short and come back (hopefully) this weekend with my son. If he's there then we can keep track of each other, game on.

Thursday, July 14, 2016

Laminar Screen Flex Mod

Back in May I purchased a Laminar Speed Screen (PN SS-961-S, S for Smoke) for my 2016 Suzuki DR650. I really did not need a highway screen; rather, all I needed was something that would deflect highway travel winds between trails a little better. The Laminar Screen was definitely the ticket.

However, the Laminar Screen mounts directly to the headlight shroud and that is one flimsy piece of plastic. So flimsy, in fact, that at any speeds over 45 mph the screen forces the shroud to flex back into the gauge area and rub on the speedometer. It's actually wearing.


I thought about various mod approaches and decided to shore up the shroud a little better in the area that it flexes. The mod I chose was to rivet a couple strips of steel plate inside the shroud such that it wouldn't allow the bend/flex..or at least as much of it.

It's a one inch strip of steel that's 6.5 mm thick. Wind is not going to bend this stuff.


I cut a couple six inch lengths and then bent the angles I needed in my vice.


I pre-drilled five 1/8" holes on each plate for the 1/8" rivets...


...and then put a good coat of black paint on them.


Then I installed them in the shroud. These will both keep the shroud from flexing at the mid-point and keep the top of the shroud forward.


Looks a little Franken-Plastic at the moment. I touched each of the rivet heads with some black paint so as not to be too obvious....not that I really cared, more to keep the rivets from rusting.

A quick trip out to he highway and back and this mod is holding up pretty good.


Monday, July 11, 2016

Ocala Forest Loop

Back on May 8 I sustained an injury to my right knee in the form of an MCL, which stands for Medial Collateral Ligament Tear. It was not a painful injury at all, but it prevented me from bending my leg at the knee and, as a result, I've been unable to ride my motorcycles. Well, to be honest, I did ride them a little, like just around town with my right leg extended, just to keep the battery charged and the carb clean.

Normally, the MCL recovery is 4 to 6 weeks, but being an older guy, things take longer to mend. At the conclusion of 8 weeks, my son and I (and one of his friends) went out for an Adventure Ride. Nothing technical, just a few gravel roads here and there. We rode about 115 miles and my leg was pretty stiff. We bailed on the rest of the ride.

Today, 9 weeks into the injury, I headed out again and had a much, much better day. I'm not at 100% but I'm close. I rode 280 miles up to Ocala National Forest and back. I didn't ride on anything more technical than the sandy service roads up there. My leg did fine and I think in a week I'll definitely be 100%.


I have a lot of places that I want to explore up in ONF. Today wasn't the day, but it will be soon.

I had my SPOT GPS Messenger Tracking all day. Here's a look at the tracking map.


Pheew! Good to be back in the saddle. I can only spend so much time fishing. :)

Sunday, June 12, 2016

Knee Injury

Five weeks and counting since my knee injury. I slid down trying to power out of a sandy rut and twisted my knee causing a MCL (Medial Collateral Ligament) Tear. I'm riding the bikes around town weekly, with a fully extended right leg, to keep the battery charged and the bikes in overall condition. Hoping for recovery starting around week six as I'm really missing the trails.

Wednesday, May 25, 2016

Chain Roller

The Suzuki DR650, like all motorcycles, has a few of those mechanical quirks that need to be addressed by their owners. Fortunately not nearly as many as my 2016 Kawasaki KLR650 but a few nonetheless. One of the easiest mods is the chain roller removal.

When I first took a look at the chain roller to see what this big problem area was, I was a little struck by the fact that the so-called chain roller doesn't actually do anything. With the bike sitting unladden, the chain can't even reach up to the roller. The only way the chain could ever make contact with the roller is by significantly compressing the rear coil spring/swing arm, such as coming off a SuperCross-like jump. But then the question is why? What is it protecting if the chain ever gets that high? The answer is...nothing. There's nothing along the entire chain length that it will make contact with and potentially damage. WTF.


Well, apparently the rollers presence in and of itself presents the possibility of damage to the motorcycles frame. In a high compression situation the chain will rise up and make contact with the chain roller with such force causing it to snap right out of the frame! Here's a stock photo of that damage that I'm talking about.


Well the mod is simply removing the roller. It's not needed anyway. The roller is attached with a single M8 bolt with a 125 pitch (12 mm head). Remove the bolt, uninstall the roller.

However, before wrapping it up, the bolt hole needs to be plugged to prevent water from getting in the frame and rusting it out. There are a number of different ways to do this. Some people fill the hole with silicone sealant. Some put a set screw in there with thread lock. Some people just put a bolt in there. I did the later (bolt-thread lock), but I found a bolt with a low rounded head so as to be less obtrusive and not interfere with the chain movement.


It's nice when a mod gets pulled off at no cost.

Monday, May 23, 2016

Laminar Speed Screen

See update at the end of this post.

The Laminar Speed Screen (Part No. SS-961-S Smoke) that I'd selected from my screen options exercise arrived in fairly quick order and I set out to install it. The mounting that is provided with the screen are eight Velcro-Like 3M Dual Lock Disks (eight more are provided for spares). The Dual Locks are definitely stronger than plain Velcro, but I'd read where the Laminar Screens with the Dual Locks had flown off in flight. A permanent mount was more my plan.


The screen is 14.5" tall, 14.0" wide (at the widest mid-point) and about 12.0" wide at top. The screen can be mounted at various levels on the DR650 headlight shroud, but it's important to get the height right if permanently mounting it like I did.


Although perhaps not a good permanent mount solution, the Dual Lock Discs were really useful to mount the screen at a couple different levels to experiment out on the road and find the height that I wanted. They were actually reusable when I removed them with some heat from my shop blow dryer. Just warm; I wouldn't put anything too hot on the screen like that which comes out of a heat gun...or the shroud for that matter.

I mounted the screen with four M6-100  flange bolts. All surfaces (each side) was buffered with a 1/8" rubber washer. In addition, I inserted 1/2" nylon spacers in the top mount points. I was careful not to over torque the bolts; doing so is what causes these screens to crack. Keep in mind that the surface is bowed into shape. Flattening them out by over-torquing is not what they want to do.

Based on where I mounted my screen, it extends 8.5" back from the headlight shroud at its current angle. If I take out the angle and measure straight up from the top of the shroud to the top of the screen it's 7.0" high.


Here's a look down the back, between the shroud and screen. In this photo, the 1/2" nylon spacer is visible on the left side; it's white. The 1/8" washer in the lower mount is also visible. It seems fairly sturdy.


I'm really liking the looks of this screen. It doesn't take away from the "dirt-bike" look that the DR650 has. I really only needed that additional seven inches to keep the wind from blowing back on the front of my helmet so hard at speed.


On the downside, while the screen itself doesn't flex back, it causes the front shroud (to which the screen is bolted) to flex back. At 50 mph, the shroud is touching the speedo. That takes a small amount of angle off the screen, but didn't reduce effectiveness. Nonetheless, I need to add some sort of brace to keep the shroud from flexing. Stay tuned!

Quick Tip: The best rubber washers for buffering vibrations are 1/8" -- 1/4" thick faucet washers found in the Plumbing Section at places like Home Depot. They're thicker than regular rubber washers found in the basic hardware sections and much better at buffering than vinyl washers. 

Update: Unfortunately, the Laminar Lip Speed Screen and the DR650 didn't get along. The screen caused extreme oscillation in the front (death wobble/tank slap) and after tinkering to try and fix the problem, my only option was to remove it. 

Tuesday, May 17, 2016

Suzuki DR650 Screen Options

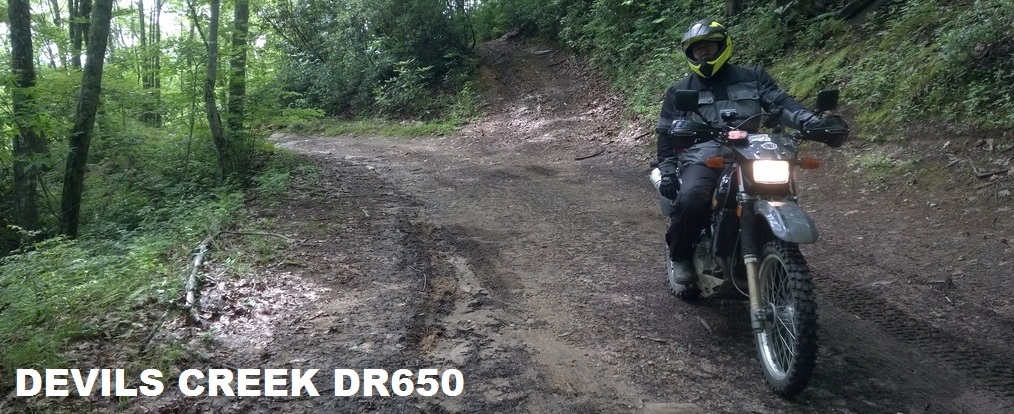
After a couple thousand miles on my 2016 Suzuki DR650S, I've decided that I need a little better wind deflection in the front. It's really not that bad and just needs a little help getting the airflow over my head as it's right directly, dead-center in my face at the moment. I know that's where it is because north of 60 mph the air flow uncomfortably pushes the bridge of my glasses into my nose. Okay, not the end of the world.

Surfing around the web, there appear to be a number of windscreen options for the Suzuki DR650. Some of the options have mounting solutions back to the bars. Some of the options mount on the headlight cover/shroud.

Cee Bailey Sport Deflector $89.00

Cee Bailey offers a commuter and sport deflector shield. I'm not interested in anything too high because it'll just snap off in a trail fall. So I'm focused on the Sport Shield. It mounts on the shroud and rises 9 inches above the shroud. It appears that alternative mounting solutions might be available for different heights, but I can't tell in the photos whether those solution would increase or decrease the height. I definitely wouldn't want to go more than 9 inches above the shroud.


The Sport Deflector comes in clear or smoke. I'm not planning on looking through this screen and definitely want an smoke, dark smoke or even an opaque black.

Bajaworx Ralley Windshield $110

The Bajaworx Rallye is similar to the Cee Bailey, but extends 7.5 inches above the shroud. It seems a little higher than that, but by comparison the CB appears to be angled back a little perhaps leading to that effect.


The Bajaworx Rallye comes in a clear and a smoke tint.

Laminar Lip Speed Shield $89.95 (at Pro-Cycles)

The speed shield is reportedly designed for motorcycles with minimal wind protection or no wind protection (like the DR650). They're designed to lower wind pressure and minimize fatigue. Ah yes, that's what I'm looking for; not a touring screen. Since it is a shroud mount, it is adjustable from 7 to 10 inches of height above the shroud top.


Interestingly, this model comes with a Velcro mounting solution for easy off, easy on. I found a couple reports that the screen came off in flight using that solution. Probably best to stick to the more permanent mount solution also included in the kit.

Turbo City (TCI) Adventure Windscreen ($197.95)

TCI makes some nice products. I have their Borrego rack on my DR650. I had a bunch of their stuff on a Kawasaki Super Sherp I had several years ago. This particular product is one of the bar clamp mounted screens. It's also quite a bit bigger of a screen than I want. It's definitely a sturdy looking contraption (as most TCI products are).


TCI stuff is also on the pricy side.

National Cycle Deflector Screen DX

There are a couple universal options out there as well. I found some DR650 owners opted for the National Cycle Deflector Screen, which is typically a Harley application. However, it's universal and they found some interesting mounting solutions.


In the case below, the DR on the left has the deflector mounted in front of the shroud while the DR on the right has it mounted behind the shroud.


Definitely some good installations there. In my case, the screen is just a little too big and I've decided to pass on any bar mount solution.

Certainly, there are many other options but these were the few that seemed to be more for deflection that I was looking for rather than full touring. Among these options, I have selected the Laminar Lip Deflector.

It's about the right size and its about the right price and here's what I was thinking: For non-adjustable (as to height) screens how do you get it in the sweet spot without having to re-mount it several times punching all kinds of holes in the shroud? Well, the answer...I think...is that Velcro mount solution of the Laminar Lip. I can use the Velcro mounting to experiment with a height to my liking and then, when I find it, re-install it with a more permanent solution. We'll see.

I order the screen from Pro-Cycle and will report back when I get it installed and properly tested.

Monday, May 16, 2016

DR650 Mudflap Mod

I'm laid up with a knee injury and to give you an idea of how bored I am, I did the DR650 Mudflap Mod today.

The mudflap in question is in two pieces directly in front of the rear tire. One of the pieces is connected to the swing arm and the other is connected above to the sub-frame. The problem warranting a mod is that there's a gap between the two pieces that allows mud and other crapola to fling into the spring area and rear of the engine. It's exasperated as the swing arm pivots up and down but there's a gap there at all times.


The mod is simply to attach a a plastic extension to the swing arm component of the mudflap. I've read people cutting up various things...plastic garbage cans, dust pans, etc...I cut up an old CD-Rom case I had laying around.


Here's my version of the extension. Sort of a Franken-Mudflap considering all the bolts, but that's the only way I could get the extension to contour with the curvature of the base.


Here are some photos of the installed extension.


Well, that took all of 20 minutes. Now what the heck am I going to do? Better heal up soon because it's primo riding right now.

Tuesday, May 10, 2016

Trackside Handguards for DR650

I was visiting Cycle Gear today and noted that they're Trackside Aluminum Handguards, normally $99.99, were on sale for $49.99. They're pretty decent quality, made of billet aluminum. One of the big attractions was that they had a number of adjustment points to facilitate universal installation.


I found the installation very simple and straight forward. I did not have to cut off the ball ends of either levers. However, I did need to slide the clutch perch <1/4 inch to the right to make the lever fit inside the handguard frame. The perch could not be shifted any further because the pull of the lever will interfere with the casing, but that <1/4 inch was enough in my installation.


At the same time, I installed some Universal Bike Master Risers that lifted the bar 21mm (13/16"). The kit comes with a couple shims to make for another 1/2" in rise if I find myself needing some more. I had plenty of cable slack at 13/16" to go higher, but I'm going to see how I like the 13/16" rise.

Some folks like to retain the bar end weights even with handguards. I don't, but for those that do, I suppose all you'd have to do is take the bar end anchor bolts up to ACE Hardware and replace them with bolts 1.5-2.0 inches longer.


Overall, these two mods were great additions to my DR650. The guards in particular are a good looking and sturdy set of handguards. Glad I went to Cycle Gear today and got in on this great sale!


___________________________

Photo of the adjustment points on the bar. A lot of handguards, including some of the expensive models, don't have adjustment points to get a good mount. I've also heard that the more adjustments that a handgaurd has, the weaker it is. My experience is that the things bend anyway when you fall over. They're main purpose is to keep the brush from ripping my gloves (and hand) all apart riding on trails. They're great for keeping cold wind off hands, too. If you don't want to bend them, don't fall.


I suppose if we consider the bar end anchor an adjustment point, then there are four adjustment points.