Thursday, March 24, 2022

The 2022 Hooch is Open for Registration

The Hooch Adventure and Dual Sport Rally is open for registration. Homebase is Suches, Georgia, dates June 11-12, 2022. The event is limited to 150 riders. The cost of $150 benefits the Georgia Area Trail Riders Association (GARTRA).

Hooch is short for the Chatahoochee Mountains where most of the riding takes place.

Sunday, March 20, 2022

Fat Bar Mod (Update)

The issue:

You replace your standard 7/8" diameter handlebar with a fat or tapered 1-1/4" bar and your expensive Barkbuster handguards no longer fit.

How I dealt with that:

In April 2017, I replaced the stock handlebar on my 2016 model year Suzuki DR650 with a Pro Taper Contour Handlebar (Henry Reed Bend) (Fat Bar Post Link). The Contour Bars are tapered from 1-1/4" in the clamp area down to 7/8" along the controls areas. I liked that bar so much that I've now installed one on my most recently purchased 2012 DR650.

Among the issues faced going from a stock 7/8" to the Contour was fitment of the handguards. Back in 2017, I simply replaced the handguards I was using for a set that fit a fat-bar. My current model DR650 has Barkbusters installed and, instead of buying a new set (Barkbuster or otherwise), I simply replaced the lower guard clamps and the anchor bolt ... for $20. 


These adapter kits were widely available on Amazon and, while they fit the job, by comparison of the kit components to those of the Barkbuster components, the quality of the materials is kind of suspect; much lighter aluminum, but I really can't speak to strength. Time will tell.

As can be seen in the following photos, I painted the adapter kit clamps and the Barkbuster frame.


Note in the photo above ^ that the short post from the handguard frame to the clamp is the Barkbuster post, not the post from the kit as shown in the preceding photo. Even though both fit, I used the BB part since those parts were obviously better metallurgically.

Note in the photo above ^ that the black plastic clamp inserts from the kit (see stock kit photo) are, in fact, used in this application. Those inserts were useful in dealing with the tapering of the bar in that particular area. The clamp bolted down firmly with the inserts.  

The Barkbuster bar end expansion/anchor bolts did not fit the new ProTaper Controur Bar.

  • Barkbuster Expansion Bolt Outer Diameter = 17.5mm
  • ProTaper Bar End Inner Diameter = 14mm

While the expansion/anchor bolts in the kit fit, I acquired and anticipated using another set of better quality anchors made by ZETA (P/N ZE71-7911); about $16 by many part suppliers. While they indeed fit, the expansion tubes did not have outer collars that are necessary to remove the anchor, if ever necessary; something I missed when purchasing. 

Anchor removal, such as was the case with the Barkbuster anchors, is accomplished by unscrewing the bolt out half an inch or so and then lightly tapping the bolt back into the bar such that the wedge pushes out of the expansion tube that remains stationary. The anchor tube needs the collar to hold it in place during that process. Without a collar the anchor tube will slide back and not separate from the wedge.   

No worries, though, the expansion/anchor bolts in the kit did the job. 

I will update any issues on this product and the related modification.

Saturday, March 19, 2022

Grip Hole

Well, it's new grip time.

If anyone is wondering how to get that nice round hole in the grip-end that is needed for the handguard mount, the answer is a step drill bit. At least that's how I do it.


In this case, bar had a 7/8" control area with, so I drilled the grip end from the center out to the total 7/8". A fat bar adaption would, of course, require a 1-1/2" hole. 

Avoid rubber overlap that may interfere with a tight contact between the handguard frame/expansion anchor bolt to the bar end. Use an Exacto knife to trim overlap and excess, if necessary.

Viola!

Saturday, March 12, 2022

(Budget) Folding Mirrors

Folding Mirrors (DRC161 Off-Road Folding Mirrors):

A popular modification for dual sport riding, particularly when lots of forest single track is involved, is folding mirrors. A perfect example of why is shown in the screenshot below from video I recorded on the Perry Mountain Tower Run Rally (Stanton, Alabama, AMA Dual Sport Series, 2019). I fatally damaged one of the mirrors on my KLX250 that year weaving in and out of the trees that guarded the tight single tracks of the mountain.


After three events so far on my recently acquired 2012 model year Suzuki DR650, I finally got around to installing some folding mirrors this weekend.

Similar to my 2016 model year DR650 (July 2017 Post) and several other model dual sports, I purchased the DRC 161 Off-Road Folding Mirrors from Pro Cycle (<$25, each). Generally, I've found these mirrors to be pretty decent in terms of mirror reflection, size + extension, visibility and structure. They're great for the dual sport rally circuit. Seriously though, if I was planning a long adventure involving lots of pavement, I'd install the stock mirrors.


Yes, yes, there appear to be many cheaper, very similar looking folding mirrors online in sites like Amazon. However, I've tried a few of them and, while the 161s certainly are not top shelf, they're better than any of those $15-a-pair mirrors.

Knob Modification

Notwithstanding, not far into my first experience with the 161s back in 2017, I'd determined that the mirrors do, in fact, have somewhat of an operational flaw. That is, they require a tool to fold and/or adjust them; specifically a 4mm hex key. As you know, dual sport is a combination of road and trail. It's a pain to adjust the mirror moving from one surface to the next and, quite frankly, I didn't. I usually either left them up or down, and if you're going to leave them down, might as well just leave them off.

Rather than leave them off when I'd like them on (or down when I'd like them up), I came up with a very simple modification to replace the hex key adjustment with permanent M6 Compression Knobs (<$6 on Amazon for five knobs). Yes, only two are needed for this mod, but I've put all the additional knobs to use on other projects. In fact, two of them hold the ramp on my Black Widow AMC-400 motorcycle hitch receiver rack.


Here's how the modification works: 

The 161 mirrors pivot on a 20mm long (thread length) M6 hex-head bolt with a 10mm hexagonal nut that is recessed in the body of the mirror pivot assembly to hold it from spinning (see photo below). The modification simply replaces that 20mm M-6 bolt and its 4mm hex-key head with a 30mm long (thread length) M-6 bolt (fine .75 pitch) with a 10mm hexagonal head. The new 30mm bolt is installed in reverse to the original bolt such that the hexagonal head of the new bolt sets in the recession where previously the hexagonal nut set. The nut is replaced with the knob.


The new 30mm M6 nuts extend an extra 10mm more than the original bolt, which allows installation of the knobs. Viola, quick adjusting mirrors.
 

Note that the 161 mirror is universal with no specific left or right mirror fitment; rather, each 161 mirror is designed for either left or right application. Therefore, the modification I've outlined is performed identically to each mirror. I have modified my mirrors such that the hexagonal bolt head (recession) points back and the knobs are positioned and pointing forward. That can be reversed if the user prefers the knobs pointing back.

Here are some photos of the modified mirrors installed on my 2012 Suzuki DR650.


Comparo to Stock Mirrors:

Below are measurements for comparison between the Stock and DRC161 mirrors:


Rise (measured from top edge of mirror perch to center of horizontal post where it meets the arm of the mirror):
  • Stock = 1.25"
  • DRC161 (adjustable) = up to 2"

Extension (measured from the center of the horizontal post along the arm and mirror surface to the outermost edge of the mirror glass area):
  • Stock = 9"
  • DRC161 = 8.75"

Mirror Size and Area:
  • Stock = square, 4" x 4.5", 18 in/2
  • DRC161 = round, 4" diameter, 12.5 in/2


Next stop..... 

..... the Wild Bear Adventure Safari in Cocoa Beach, Florida, April 6 and 7 ... a rally that I will definitely be folding the mirrors out of the way.
Lost and Stuck in Devil's Creek

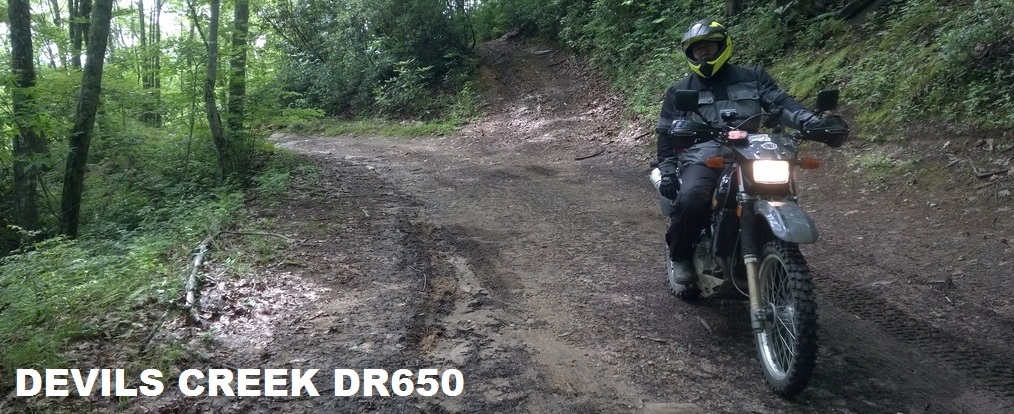
The first leg of the 2022 AMA Dual Sport Series kicked off last weekend in the Creek; that is, Devil's Creek located deep in the Withlacoochee Forest near Brooksville, Florida. This event, hosted by my local club, Dixie Dual Sport, is truly a technical challenge, particularly if you get lost as did my five-rider group. We could have turned around to get back on track, but we noted a nearby forest road on the GPS that would have gotten us back on track. Ultimately, it did, but we had to go through part of the forest not on the event track. 


We ultimately had three motorcycles stuck in that section. One in the water crossing that we were attempting to circumnavigate in the bypass and then the two you see in the photo above in the muddy bypass. Basically, we just pushed them all out. That's usually all it takes.

Here's some video of how we got there.


ZETA-Racing Rubber Killer Bar Clamp Bushings

UPDATE TO JULY 2017 POST:

March 2022:  In July 2017, I posted about a handlebar alignment problem on my 2016 model year DR650 that ultimately turned out to be a bent steering head bolt. While the bolt replacement was inexpensive and a very simple task, it was elusive (I thought the bar was bent) and I complained about a steering head design that used "rubber" bushings to hold the clamp form spinning and tilting. 

I now ride a 2012 Suzuki DR650 and have identified a modification that should reduce the likelihood of bending the steering clamp bolt as discussed in the original thread.

The product is ZETA-Racing Rubber-Killer Steering Head Bushings (<$20). The ZETA bushings are aluminum replacements to the stock rubber bushings and should hold the steering head together better than the rubber bits. More vibration? I have experienced none. Hard to install? Nope, it's one bolt per clamp, pop out the rubber bushings, install the ZETA bushings and replace the bolt ... although carefully have a look at the bolt to see if it is bent and replace if necessary.

The ZETA part is ZE37-0331, which is specifically shown as fitting the DRZ-400. However, they fit the DR650 as is my experience and a number of others that reported same on the DR650 Facebook Owner's Page. 


ZETA appears to be a Quality Powersport Manufacturer; check out their Website. I got my ZETA kit on Amazon for $17.95 during February 2022. Of course, prices change over time. 

ORIGNIAL POST:
July 2017

My 2016 DR650 is, first and foremost, a rally bike and it's been down a few times. It's not uncommon for rally falls to cause the front forks and bar to go out of alignment. It's a fairly easy process to straighten everything out, but I haven't been able to get the alignment exact for some time. It hasn't been significantly off, but just enough to make it slightly annoying.

In short, after studying the design of the DR650 steering head I isolated the problem to the bolts that hold the bar cradles in place. The bolt extends through the cradle as shown in the diagram and then through upper and lower dampeners. 


Sure enough, when I got it broken down, the left bolt was bent.


I probably could have gotten some replacements from my local hardware store, but decided on OEM bolts since I was buying some other stuff from RockyMountainATV. The newly purchased bolts are a better grade and fit in the cradle much better. Apparently, this isn't a new issue.


Now that I know what the problemo is, I'll have a spare set of these bolts for my travels.

One last comment...

As mentioned, the bar cradles and upper tree are supported by upper and lower rubber dampeners. The rubber cone things in the photo and parts 12 and 13 in the exploded diagram. I am really kind of unimpressed with this design. The normal design is the bar clamp built into the top tree. This design is a double weak spot. First, the bolt as we've seen here and, second, that rubber cone is a problem waiting to happen....and $50 per clamp to replace.

Wednesday, March 2, 2022

Dual Sport GPS Routes vs Tracks

I spend most of my saddle time these days on dual sport rallies and similar events. For many of these events I receive GPX Tracks or Roll Charts or Both. As you may know, GPX navigation files come in either Route-form or Track-form, and Tracks are the norm for dual sporting. Of late, though, I've noted that some participants in the regional rallies (perhaps nationally) convert the Tracks to Routes. Such conversion can be accomplished on software applications like Garmin BaseCamp. I think this conversion is a mistake.

What follows is my opinion on why we do not want to convert the Rally Tracks to Routes. Of course, opinions, such as those reading my blog, may differ.


The photo above is my Garmin GPSMap 64st tracking the Event Organizer's path and accompanied with a roll chart during the 2018 Devils Creek Dual Sport Rally.

Routes and Tracks

By way of background, a Route is a map-based navigation wherein a GPS device navigates the motorist on roadways along a series of points (think of tacks sticking in a paper wall map) using embedded electronic navigation preferences and avoidances. By map-based, I mean those roads and waypoints carefully mapped out for Garmin City Navigator, TomTom Navigation and GoogleMaps (all three are different databases, btw). A Route needs one of those three maps to navigate and will navigate only along the "recorded" roads and to/from "recorded" waypoints. 

A Track, on the other hand, is simply a ground-based recording of movement without regard to roads and waypoints. While a Track needs basic mapping perspectives for things like longitudes, latitude and, in some instances, elevation, it does not care about roads and waypoints and doesn't need any maps, such as City Navigator. For a few examples, I create, use and reuse Tracks for hiking, mountain biking, hunting and kayaking because there aren't any navigation identification points (roads or waypoints) in Garmin/TomTom/GoogleMaps for the locations/areas for conducting those kinds of activities. The photo below is an example of a hiking track in Garmin BaseCamp.

File Photo
Application to Dual Sport

Taking this closer to home, from the riding perspective, dual sport events are essentially "navigation" events. We're not out there racing or getting graded on our trials performances. No, it's about navigation, and a lot of work went into that navigation. 

The reason Tracks are used for dual sport navigation is so riders can navigate the exact recorded paths that the event "Organizers" created for the ride (i.e. concise-navigation). The exact path was determined so as to include all those cool dirt roads and technical areas that the Organizer's thought would make for a great ride; oh, and avoid obstacles that might make for a bad day for someone. This is basically to say, for purposes of dual sport navigation, (i) the Organizers and not the GPS device have designed/determined/designed the navigation path participants will ride, and they have done so by actually riding and recording the paths and (ii) some of the paths selected by the Organizers may not even be roads that are recognized by the maps stored in the GPS device and used for Routing. As a result, converting a Track to a Route will change the path for the dual sporting event, perhaps significantly. On the former, (i, above) even if the GPS device recognizes the track-path as a roadway, it may divert the rider to a totally different recognized roadway because preferences/avoidances (e.g. fastest route) tells the device to do so. On the later, (ii, above) there are many trails on the Organizer's path that are not even recognized on the map services (e.g. City Navigator). In those cases, the GPS device decides how the rider will navigate point-to-point using only recognized roadways.

This screenshot is a Motorcycle Track in Garmin BaseCamp.

File Photo

So, aside from camping, sponsor tents, drinking beer and vintage motorcycle shows, dual sport events are basically concise-navigation-events and conversion of a carefully developed and recorded Track to a Route creates a Route that will be different from the path that the event Organizers spent lots 'o hours putting together. I do understand that not all GPS devices are designed to navigate tracks. In those cases, hopefully there's a roll chart available.